Weekend Project: Bathroom Wallpaper

If you’ve been looking for a way to make a big impact without taking on a full renovation, peel-and-stick wallpaper is such a fun option. I recently installed Mitchell Black peel-and-stick wallpaper in my space, and while it definitely took patience, it ended up being a very doable DIY project.
Because I wanted the best possible result, I made sure to prep my walls first. I primed them ahead of time and let them dry for longer than the recommended 48 hours before installation. That extra prep gave me a smooth, clean surface to work with and helped the wallpaper adhere really well.
Supplies for Peel-and-Stick Wallpaper Installation
Before getting started, I gathered all of my supplies so everything would be within reach as I worked. For this project, I used Mitchell Black peel-and-stick wallpaper, scissors, a tape measure, a level, a smoothing tool, a seam roller, and a sharp utility knife for trimming.
Having the right tools on hand made the process much easier—especially since I completed the installation on my own.

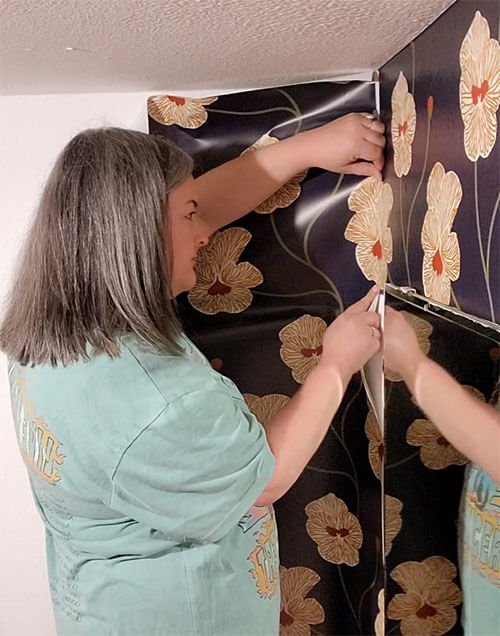
Starting the First Piece
I started in a corner and measured the height of the wall where my first piece would go. Then I cut the wallpaper slightly longer than needed so I would have extra at the top and bottom for trimming later.
Getting that first strip level was the most important part of the whole project. Using a level, I made sure the edge was perfectly straight before attaching it to the wall. I peeled back just a few inches of the backing at the top, secured that section first, and once I knew it was straight, I continued peeling away the backing as I pressed the wallpaper into place.
As I worked, I smoothed the wallpaper from the center outward to help eliminate bubbles and keep the surface flat. Once the full piece was installed, I used my smoothing tool to press everything firmly into place.

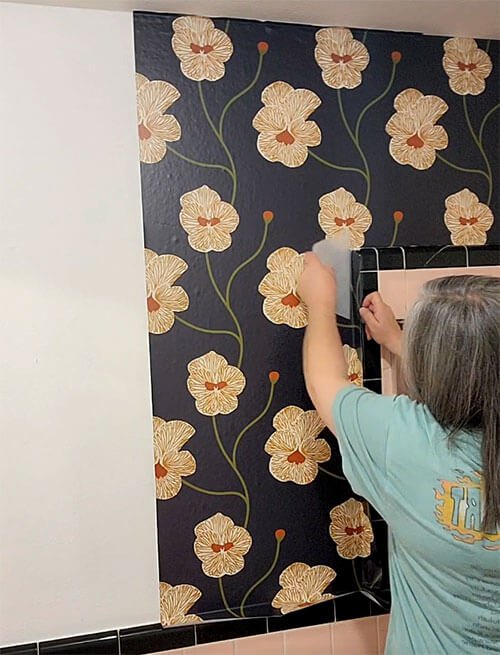
Trimming for a Clean Finish
After the first strip was fully in place, I trimmed away the excess at the ceiling and along the bottom edge of the wall. In my case, the wallpaper stopped at tile, so I used my smoothing tool as a straight edge and carefully ran my blade along it to create a clean, straight cut.
This step really helped give the finished installation a polished look.

Matching the Pattern on the Next Pieces
For the second piece and every piece after that, I had to measure based on the pattern rather than just the wall height. I measured from the point in the pattern that needed to line up to the ceiling, and made sure I left extra above that point. Then I measured from that same pattern point down to the tile so I could be sure the piece would reach where it needed to go—with a little extra there too.
Once the piece was cut, I peeled back about a foot of the backing at the top and carefully matched the pattern before sticking it down. After I was sure the pattern was aligned correctly, I continued applying the wallpaper by slowly pulling away more backing and smoothing as I went.
That same process continued all the way around the room: match the pattern, stick the wallpaper in place, smooth it out, and trim the excess.
Working Around Corners and Tricky Spots
The only real challenge came in areas where I had to cut around corners in the middle of a piece. For those spots, I just had to work more slowly and make strategic cuts so the wallpaper could lay flat. Once it was sitting correctly against the wall, I could see exactly where the next cut needed to be.
Taking my time in those areas made a big difference and helped me keep the finished look as clean as possible.
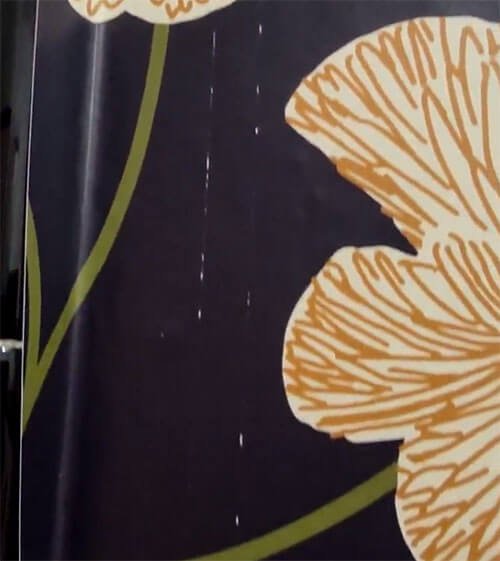
A Quick Lesson Learned
I did make one mistake during the installation. My smoothing tool still had a sticker on the side, and the rigid edge of it scratched the wallpaper. I ended up having to remove that piece and reapply it.
After that, I removed the sticker and made sure I wasn’t letting the edge of the smoother rub against the paper while I worked. It was a small detail, but definitely something worth checking before you begin.
Installing Wallpaper Solo
I completed this project on my own, but one thing worth mentioning is that the bottom half of my room was tile. That meant I wasn’t working with full-length floor-to-ceiling wallpaper panels.
If you’re installing wallpaper on a full-height wall, it may be more challenging to keep everything aligned—especially when matching a pattern. In that case, having a second set of hands could make the process easier.
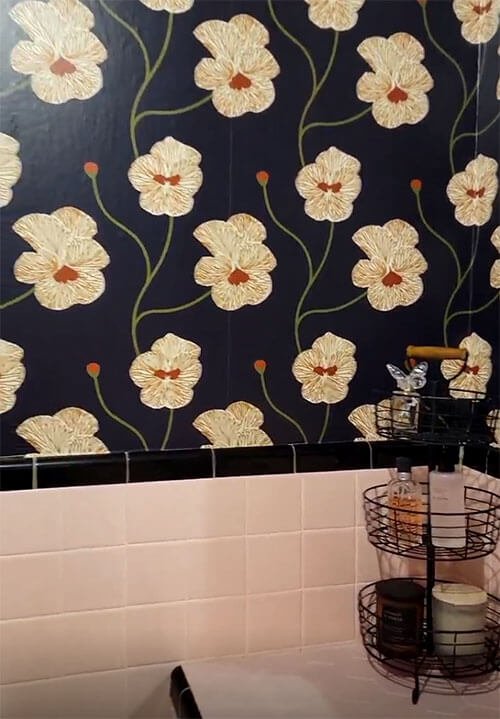
The Final Result
This project ended up making such a big impact in the room. The wallpaper added color, pattern, and personality, and because it was peel-and-stick, it felt much more approachable than traditional wallpaper installation.
If you’re willing to spend a little extra time measuring carefully, keeping your first strip level, and matching your pattern as you go, it’s a project that can absolutely be done yourself.
SHOP WALLPAPER
Want to see how it all came together? Watch the video below for a closer look at the installation process.