How to Attach Furniture Legs: Methods for Style and Stability

Upgrading your furniture doesn't always require a full overhaul. One of the fastest and most affordable ways to transform a piece, from a vintage dresser to a modern sofa, is to change out the legs.
It doesn't matter if you're adding height to a mid-century credenza or giving a tired bench new character, learning how to attach furniture legs the right way can boost the style and stability of your piece.
In this guide, we'll cover:
- Furniture legs, furniture feet and when to use each
- The main types of furniture legs
- How to choose the right style and attachment method
- Step-by-step instructions for each installation type
- Pro tips for pairing form with function
FURNITURE FEET & LEGS
Furniture Legs vs. Furniture Feet: What's the Difference?
Before we get into installation techniques, let's clear up a common question: what's the difference between furniture legs and feet?
They both support and elevate your furniture, but they do it in different ways and with different design effects.
Furniture Legs
Furniture legs are taller, vertical or angled supports that create space between your furniture and the floor. They often define the height, stance, and style of a piece.
Used for:
- Raising sofas, tables, dressers, and cabinets
- Supporting the structure of a piece
- Adding a clean, modern, or architectural look
Common styles:
- Tapered mid-century legs
- Straight or angled wood legs
- Hairpin metal legs
- Turned or carved traditional legs
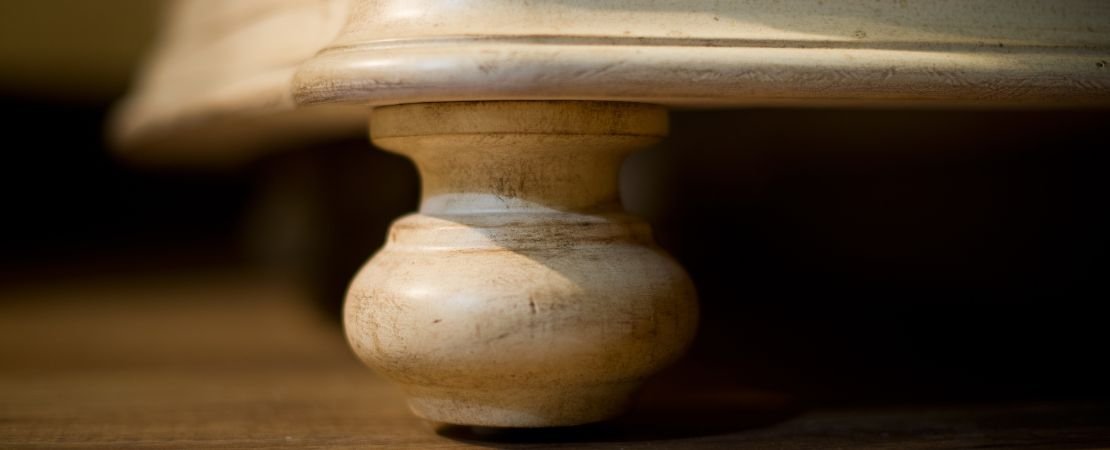
Furniture Feet
Furniture feet are shorter and typically more decorative. They're ideal for adding subtle height or a finished look, especially on heavier or vintage-style pieces.
Used for:
- Replacing worn feet on sofas or cabinets
- Creating period-accurate restorations
- Elevating a piece just a few inches for airflow or cleaning
- Providing hidden or low-profile support
Common styles:
- Bun feet (rounded, classic shape)
- Block feet (transitional or modern)
- Carved feet (claw, ogee, bracket styles)
Which One Should You Choose?
Not sure whether your project calls for furniture legs or feet? Your choice depends on design goals, furniture weight, and desired height/visual impact.
Quick reference:
- Goal: Add height and function - Choose: Legs - Why: They offer support and lift.
- Goal: Maintain a traditional look - Choose: Feet - Why: Decorative and period-appropriate.
- Goal: Modernize older furniture - Choose: Tapered legs - Why: Clean lines, updated stance.
- Goal: Refresh base without major changes - Choose: Feet - Why: Quick install, big visual impact.
- Goal: Support heavy weight - Choose: Legs with brackets - Why: Strong and stable.
Pro takeaway: Understanding the difference helps you pick the right component for both style and function. In many cases, you might use both, feet for decorative framing and legs for functional support.
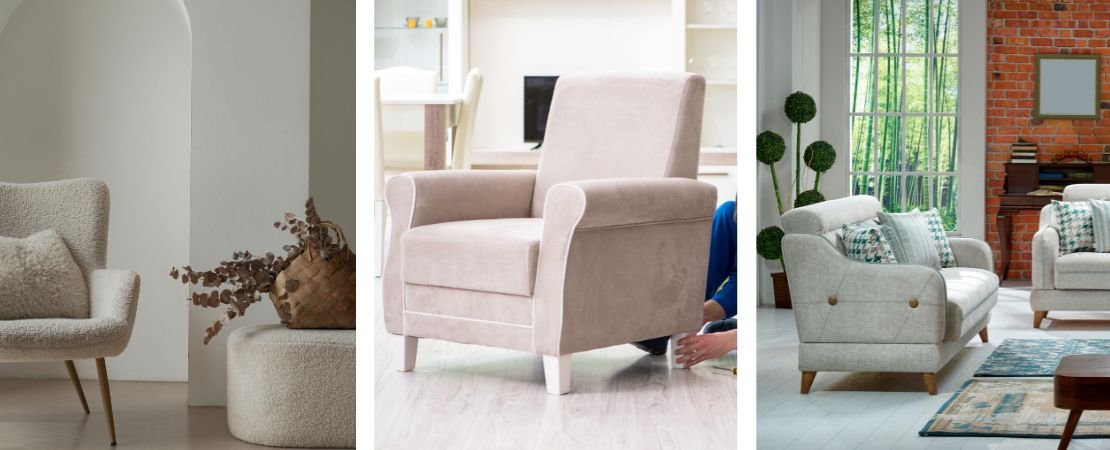
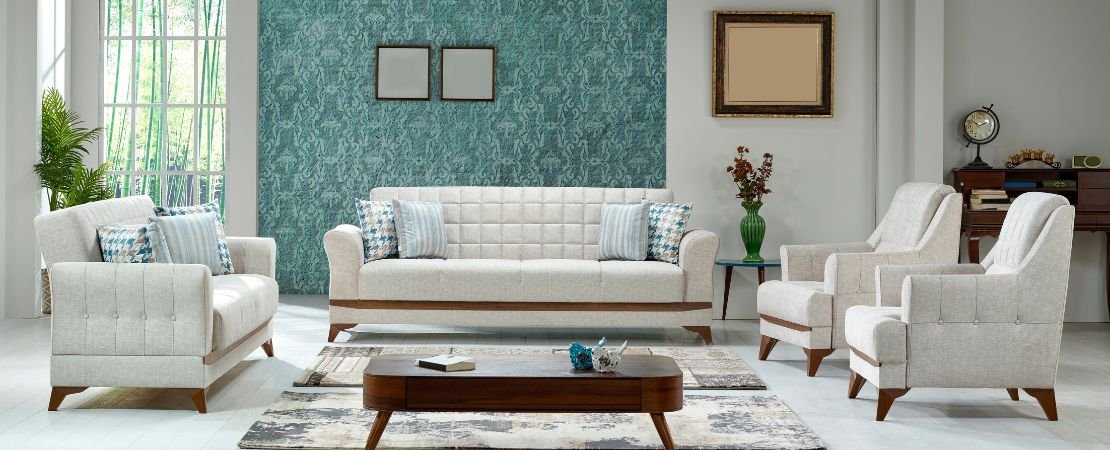
Types of Furniture Legs You Can Install
Before diving into installation methods, it helps to know what you're working with. Here are four of the most common types of furniture legs you'll find at VDR:
- Straight Legs — Clean and timeless, often found on dressers, buffets, and tables.
- Tapered (Mid-Century Style) Legs — Angled stance and sleek profile; bring retro charm to modern spaces.
- Bun Feet and Turned Legs — Decorative options for traditional or antique furniture; add craftsmanship.
- Metal Hairpin Legs — Minimal and modern; perfect for reclaimed wood tabletops, benches, or industrial decor.
BROWSE FURNITURE FEET & LEGS
5 Common Ways to Attach Furniture Legs
There's no one-size-fits-all method. Material, load, and leg/foot style determine the best approach. Some legs have pre-installed hanger bolts for top plates; others use dowels and glue. For heavy pieces like sofas or vintage cabinets, bracketed hardware adds stability. For decorative feet, choose hardware that stays hidden.
1) Top Plates (Straight and Angled) – Easiest for Most DIYers
Best for: Sofas, chairs, small tables
Van Dyke's legs: Tapered, straight, or bun feet with hanger bolts
What you need:
- Metal top plates (flat or angled)
- Screws (usually included with the plates)
- Drill and screwdriver
Steps:
- Flip the furniture over and mark leg positions.
- Attach the metal top plates using screws.
- Twist each leg (with pre-installed hanger bolt) into the plate's center hole.
- Tighten by hand; use a wrench for final adjustment if needed.
When to use: Fast, sturdy, and great for beginners.
2) Dowel + Glue Method – Traditional for Wood Legs
Best for: Desks, wood tables, period furniture
What you need:
- Wood legs with dowel pegs
- Wood glue
- Drill and matching drill bit (if adding dowel holes)
- Clamps (optional)
Steps:
- Drill dowel holes into the furniture base.
- Apply strong wood glue to both surfaces.
- Insert the dowel and press the leg into place.
- Clamp while drying (24 hours recommended).
When to use: Preserves the authentic, antique look; ideal for restorations.
3) Corner Brackets – Great for Sofas and Heavy Pieces
Best for: Sectionals, large chairs, dressers
What you need:
- L-shaped metal brackets
- Screws
- Drill
Steps:
- Align the bracket inside the frame corner.
- Screw the bracket into the frame securely.
- Attach the leg into the bracket's center mount.
Why it's great: Very stable. Excellent for heavy loads.
4) Bolt-On Legs (Threaded Inserts) – For Clean, Flush Looks
Best for: Modern cabinets, sideboards, media consoles
What you need:
- Legs with bolts
- Threaded insert nuts
- Allen wrench or hex driver
Steps:
- Drill a hole sized for the threaded insert.
- Tap the insert until flush with the surface.
- Screw the leg's bolt into the insert.
Why it's great: Removable and sturdy with a clean, finished look.
5) Mounting Blocks – Hidden Support for Decorative Feet
Best for: Bun feet, low-profile decorative legs
What you need:
- Wood mounting blocks
- Screws and glue
- Pre-drilled legs or feet
Steps:
- Attach the mounting block to the furniture bottom.
- Screw or glue the foot to the block.
Why it's great: Keeps hardware hidden for a clean, finished base.
How to Choose the Right Leg Style for Your Piece
Choosing legs (or feet) isn't just about looks it affects height, stability, cleaning clearance, and room fit.
Think about:
- What type of furniture are you updating? (A sofa needs different support than a cabinet or bench.)
- How much weight does it need to hold?
- Are you aiming to modernize the piece or keep its vintage charm?
- How much clearance do you want for cleaning, storage, or style?
Quick pairing guide:
- Furniture Type: Sofa or Armchair — Recommended Leg Style: Tapered, Bun Feet — Best Attachment: Top Plate or Bracket
- Furniture Type: Mid-Century Dresser — Recommended Leg Style: Tapered Legs — Best Attachment: Top Plate or Threaded Insert
- Furniture Type: Antique Cabinet — Recommended Leg Style: Turned Wood Legs — Best Attachment: Dowel + Glue
- Furniture Type: Reclaimed Table — Recommended Leg Style: Metal Hairpin, Straight Wood — Best Attachment: Bolt-On or Top Plate
- Furniture Type: Entry Bench — Recommended Leg Style: Metal Hairpin, Bun Feet — Best Attachment: Mounting Block or Bracket
Pro Tips for Installation Success
Attaching furniture legs or feet is a beginner-friendly project, but taking a few extra precautions can make the difference between a quick upgrade and a frustrating redo. Follow these pro tips to get clean results that look great and hold up over time.
Use Felt Pads or Levelers
After installation, add felt pads or adjustable levelers to protect floors and fine-tune stability. Levelers help eliminate wobble on older furniture or uneven floors.
Measure Twice, Drill Once
Double-check leg placement before drilling or attaching plates. Misalignment leads to wobble and visual imbalance, especially on visible-leg pieces. Pro tip: Use painter's tape and pencil marks; for symmetrical pieces, measure from the center out.
Choose Finish and Height with Care
- 2"–4" legs/feet maintain a traditional or antique profile.
- 6"–8" tapered legs create a mid-century or modern stance.
- Coordinate metal finishes (brass, black) with hardware or lighting.
- Paint or stain wood legs to match or contrast for a custom look.
Shop Furniture Legs & Feet at Van Dyke's
The right furniture legs or feet can completely change a piece. At Van Dyke's, you'll find high-quality options in solid wood, metal, and composite finishes, to add the right touch to your project.
- Tapered legs for a mid-century vibe
- Turned wood styles for traditional looks
- Metal hairpin legs for modern minimalism
- Block feet for low-profile support
- Bun feet for vintage cabinets and dressers
Multiple heights and finishes—from natural woods to matte black and antique brass making it easy to match or customize your project.
Attaching or replacing furniture legs is a beginner-friendly DIY upgrade that can transform your furniture in an afternoon. With the right hardware and a little planning, you'll improve height, style, and stability, from sofas and cabinets to benches and tables.
Looking for more DIY furniture upgrade ideas? Check out our blog archive for tips on refinishing wood, installing tambour panels, and more.